Your smartphone has one of the most advanced cameras ever built into a pocket-sized device. The hardware is remarkable. But if your photos still come out blurry, poorly lit, or just plain uninspiring — the issue is almost never the camera. It is the technique.
The gap between an average photo and a stunning one taken on the same phone comes down entirely to how you use the camera — not which camera you have. A photographer with excellent skills will consistently produce better images on a budget phone than an untrained user with the latest flagship.
This guide gives you 15 practical, immediately applicable tips that will transform how you shoot. These work on any phone — iPhone or Android, flagship or budget — and none of them require buying any new equipment.
Before You Shoot Anything — Start With This
Before getting into the 15 tips, there is one thing every smartphone photographer needs to do before picking up their phone to shoot: clean the lens.
Your phone lives in your pocket, your bag, and your hands all day. The camera lens accumulates fingerprints, dust, and smudges constantly — and every bit of that grime degrades the sharpness, contrast, and clarity of your photos.
Take five seconds before any important shot to wipe your camera lens with a soft cloth or the clean corner of a cotton t-shirt. This single habit will immediately make a visible difference in the sharpness and clarity of everything you shoot. It sounds too simple to matter — it matters more than most people realize.
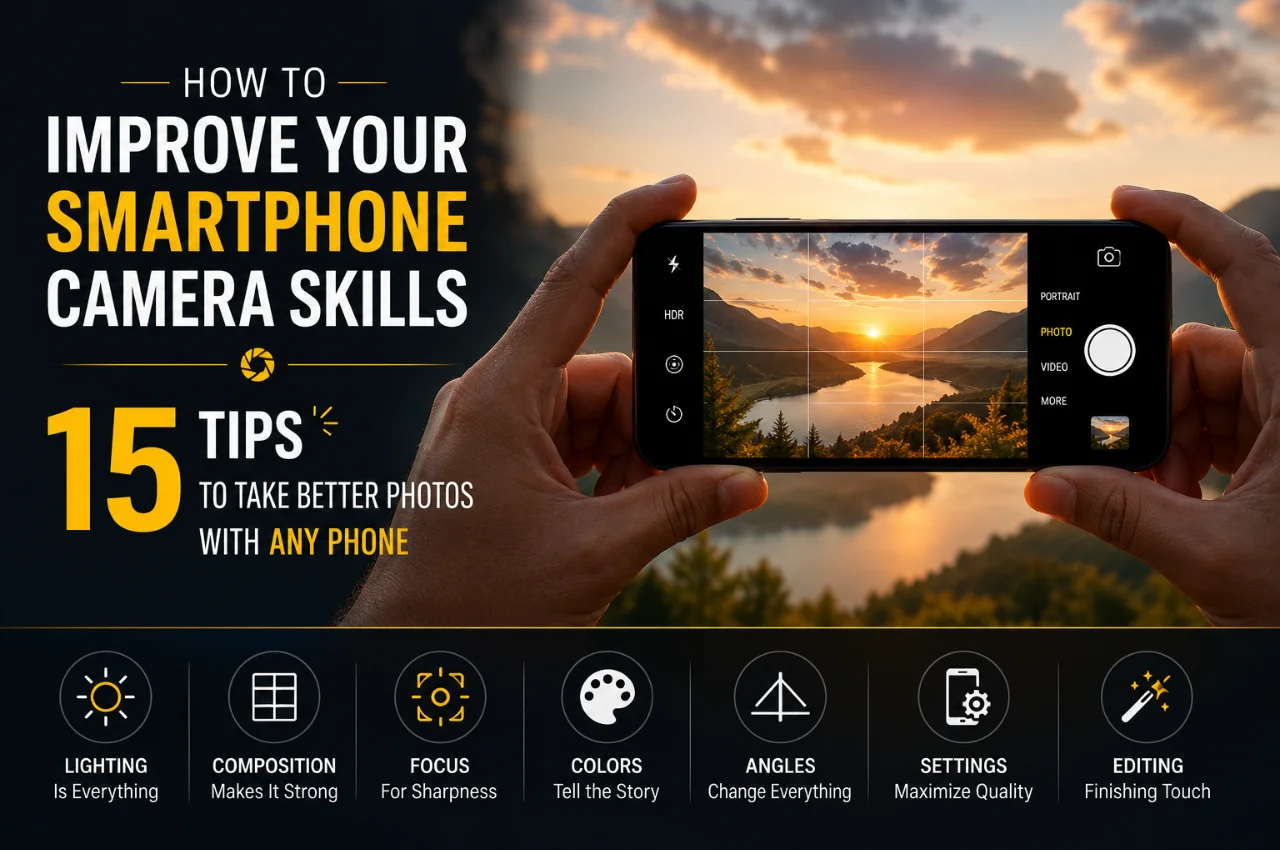
Tip 1 — Learn the Rule of Thirds and Enable Your Grid
The single most impactful thing you can learn about photography — on any camera — is composition. And the most fundamental rule of composition is the Rule of Thirds.
The Rule of Thirds works like this: divide your frame into nine equal sections using two horizontal lines and two vertical lines — like a tic-tac-toe grid. Instead of placing your subject dead center in the frame, place them at one of the four points where these lines intersect. Position horizons along the horizontal lines rather than running through the middle of the frame.
This approach creates photos that feel naturally balanced, dynamic, and visually interesting rather than flat and static. Centered compositions can feel rigid and boring. Off-center compositions feel alive and intentional.
The great news is that you do not have to imagine the grid — your phone can show it to you permanently. On iPhone, go to Settings, then Camera, then enable Grid. On Android, open the Camera app, go to Settings, and enable Grid Lines or Guide Lines. Once enabled, the grid appears as a faint overlay every time you open the camera, helping you compose every shot more deliberately.
Tip 2 — Tap to Focus, Then Adjust Exposure Separately
Most people open the camera app and just tap the shutter button immediately. The camera makes its own decisions about what to focus on and how bright to make the image. Sometimes it gets it right. Often it does not.
The solution is simple: always tap the screen on the exact subject you want to be in sharp focus before shooting. This manually tells your camera where to focus rather than letting it guess.
But here is the part most people miss — on both iPhone and Android, after you tap to focus, a small exposure adjustment tool appears on screen. On iPhone, a sun icon appears beside the yellow focus box. Swipe up to make the image brighter, swipe down to make it darker. On most Android phones, a slider appears that does the same thing.
Using this tool correctly means you can nail both the focus point and the exposure in every shot rather than accepting whatever the automatic system decides. A photo that is slightly underexposed is almost always better than one that is blown out with lost highlights — you can brighten a dark photo in editing, but you cannot recover detail from a completely white overexposed area.
Tip 3 — Use Natural Light Whenever Possible — and Position It Correctly
Light is the single most important element in any photograph. Not your phone’s camera quality. Not the megapixel count. Light. Every professional photographer will tell you this — and it is equally true for smartphone photography.
Natural light from the sun is generally the most flattering and the most beautiful light source available to you at no cost. Here is how to use it correctly.
The golden hour is the period of approximately 45 to 60 minutes after sunrise and before sunset. During golden hour, sunlight comes in at a low angle, is warm in color, soft in quality, and wraps around subjects beautifully. Photos taken during golden hour almost always look stunning with minimal effort. Plan outdoor portrait sessions or landscape shots for this window whenever possible.
Overcast days are a secret weapon that beginners overlook. When the sky is cloudy, the clouds act as a massive natural diffuser — scattering sunlight in every direction and eliminating harsh shadows. Overcast light is soft, even, and flattering for portraits and food photography. Overcast days are some of the best days to shoot.
Harsh midday sun — direct sunlight between 10 AM and 3 PM — is the most challenging light for smartphone cameras. It creates deep, unflattering shadows under eyes and chins in portraits and blows out bright areas of the scene. If you must shoot in midday sun, move your subject to open shade — under a tree, beside a building, under an overhang. The light in shade at midday is still bright enough for clean photos but without the harsh directionality.
Most importantly: position your light source so it falls on your subject’s face, not behind them. When you shoot with a strong light source directly behind your subject — a bright window, the sun — your subject becomes a silhouette. Unless you specifically want a silhouette, always position yourself so the light falls on the front of your subject.
Tip 4 — Never Use Digital Zoom — Move Closer Instead
This is one of the most common mistakes smartphone photographers make, and it costs them significant image quality every time.
When you pinch to zoom on your phone’s camera screen — unless your phone has a dedicated optical telephoto lens — you are not actually zooming. You are digitally cropping and enlarging the image. The result is a photo that is smaller in resolution, softer in sharpness, noisier in texture, and generally worse in every measurable way than a photo taken at normal magnification.
The solution is simple: move closer to your subject. Walk toward it. Reposition yourself. Get physically closer rather than zooming with the screen.
If you cannot get physically closer and you need a tighter shot, take the photo at the widest field of view your camera offers and crop it afterward during editing. Cropping a full-resolution photo gives you much better quality than digital zoom — because you are working with all the original image data rather than an artificially enlarged version of it.
The exception to this rule is if your phone has a dedicated telephoto lens — marked as 3x, 5x, or 10x on the camera interface. Tapping these preset zoom levels activates the actual optical telephoto camera, which delivers genuine zoom without quality loss. Using these discrete zoom levels is fine. Pinching to zoom between them is digital zoom and should be avoided.
Tip 5 — Shoot in Portrait Mode Correctly
Portrait mode is one of the most popular camera features on modern smartphones, and one of the most misused. It creates the beautiful blurred background effect — called bokeh — that makes subjects stand out dramatically from their surroundings.
But Portrait mode only works correctly under specific conditions — and ignoring these conditions produces poor, artificial-looking results.
Distance matters enormously. Portrait mode works best when your subject is between two and five feet from your camera lens. Too close and the effect is unpredictable. Too far away and the depth estimation fails, producing unrealistic blurring that does not look natural.
Separation between subject and background also matters. The more distance between your subject and whatever is behind them, the more natural and impressive the background blur will look. Position your subject away from walls and background elements rather than standing directly in front of them.
Lighting matters for Portrait mode more than for standard shooting — because the phone’s AI is processing the image more heavily. Portrait mode in harsh lighting or very dark conditions often produces less convincing results than in soft, even natural light.
After taking a Portrait mode photo, you can adjust the intensity of the blur in your phone’s photo editor. On iPhone, open the photo, tap Edit, and adjust the Depth slider. On many Android phones, the blur intensity can be adjusted in Google Photos or Samsung Gallery after the fact.
Tip 6 — Use Night Mode for Low Light — Correctly
Most modern smartphones have a dedicated Night mode that dramatically improves low-light photography by taking multiple exposures and merging them into a single bright, detailed image. This is one of the most technically impressive features in smartphone cameras today.
But Night mode requires one thing to work well: stability. Because Night mode takes several exposures over a period of one to several seconds, any movement during that time results in blurry photos. The longer the Night mode timer, the more stable your phone needs to be.
To use Night mode effectively, always hold your phone with both hands. Rest your elbows against your body to reduce movement. Better yet, rest the phone against a wall, a table, or any stable surface. Some phones display a countdown timer showing how long Night mode is capturing — hold the phone completely still for the entire duration of that countdown.
On iPhone, Night mode activates automatically in low light — look for the moon icon at the top of the camera. You can tap it to adjust the exposure time or turn it off. On most Android phones, Night mode is accessible by swiping through the camera modes at the bottom of the screen.
One important note: Night mode works well for static scenes — streets, landscapes, buildings. For moving subjects in low light — people walking, candles, events — Night mode can produce motion blur. In those situations, using the standard camera mode with the phone’s HDR enabled and keeping ISO as low as possible gives more consistent results.
Tip 7 — Use Burst Mode for Action and Moving Subjects
Capturing the perfect moment of action — a child jumping, a pet mid-play, a ball in the air, waves crashing — is one of the hardest challenges in photography. Taking a single photo and hoping the timing is perfect rarely works.
Burst mode is the solution. It captures multiple frames per second continuously while you hold down the shutter button, giving you a series of shots taken in rapid succession from which you can select the sharpest, best-timed image.
On iPhone, press and hold the shutter button to activate Burst mode — a counter will show how many frames have been captured. On Android phones, the method varies by brand — on Samsung, press and hold the shutter button; on other Android phones, it may be in the camera settings or accessible by swiping the shutter button to one side.
After shooting in burst mode, your phone may show all frames in the burst, or you can view them through your gallery. Select the best frame and delete the rest to save storage space.
Tip 8 — Lock Focus and Exposure for Consistent Shots
If you have ever noticed that your camera keeps refocusing or changing brightness while you are trying to shoot — especially in video or when photographing a static subject — you need to lock focus and exposure.
Both iPhone and Android allow you to lock both the focus point and the exposure setting by pressing and holding on your subject on the screen rather than just tapping. On iPhone, pressing and holding brings up the AE/AF Lock message, indicating that both focus and exposure are now locked. They will remain locked until you tap elsewhere on the screen. On Android, pressing and holding achieves the same result.
This is especially useful when shooting products, food, still life arrangements, or any static subject where you want consistent exposure across multiple shots without the camera constantly readjusting.
Tip 9 — Explore Pro or Manual Mode
Every Android phone has a Pro or Manual mode in the camera app — usually found by swiping through the camera modes. Many recent iPhones also have manual controls available. This mode gives you direct control over three key settings that determine the look of your photos.
ISO controls your camera’s sensitivity to light. Lower ISO numbers (100, 200) produce clean, sharp images with minimal noise but require more light. Higher ISO numbers (800, 1600, 3200) allow shooting in darker conditions but introduce visible grain and noise. Always use the lowest ISO that allows a properly exposed photo in your given light conditions.
Shutter Speed controls how long the camera sensor is exposed to light. Fast shutter speeds (1/500s or faster) freeze motion and are ideal for action photography. Slow shutter speeds (1/30s or slower) allow more light in but require stability to avoid blur — and can create beautiful creative effects like silky smooth water or light trails at night.
White Balance controls the color temperature of your photos. Auto White Balance generally does a good job, but manually setting it ensures consistent color across a series of shots in the same lighting conditions — particularly useful for product photography, food photography, and portrait sessions.
You do not need to use Pro mode for every photo — the automatic mode handles most everyday situations well. But understanding these three settings gives you creative control over challenging situations that automatic mode handles poorly, such as shooting a fast-moving subject, creating intentional motion blur, or shooting in mixed artificial lighting.
Tip 10 — Master Composition Beyond the Rule of Thirds
The Rule of Thirds covered in Tip 1 is the starting point — but there are several other composition techniques that will immediately make your photos more visually compelling.
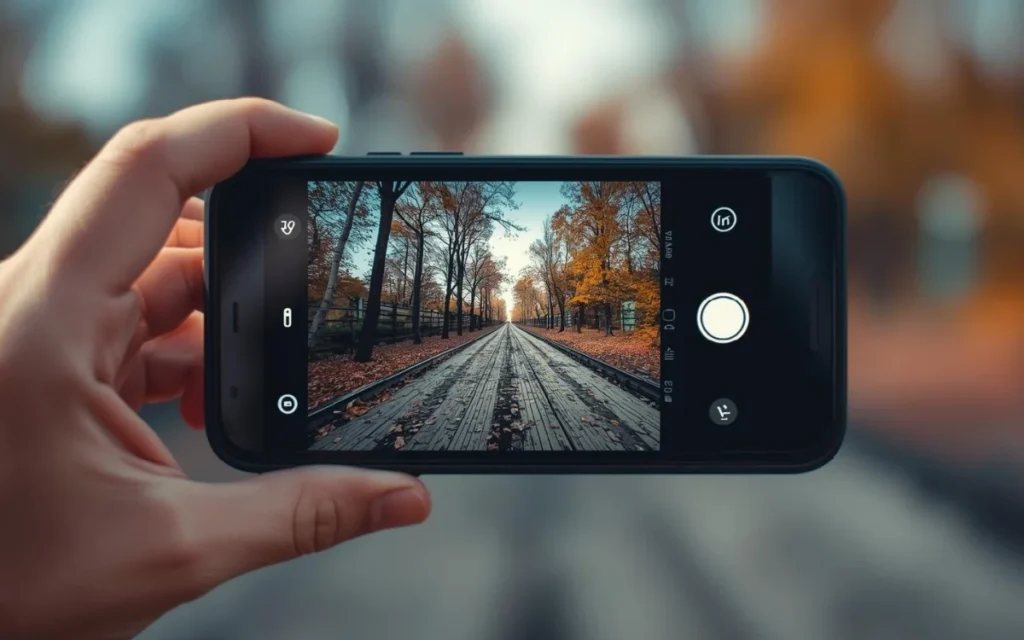
Leading lines are one of the most powerful composition tools available. These are lines in the scene — a road, a fence, a river, a staircase, a row of trees — that naturally guide the viewer’s eye through the frame toward your main subject. Look for leading lines in every scene you photograph and position yourself to use them.
Framing uses elements within the scene to create a natural border around your subject. Shooting through a doorway, an archway, between tree branches, or through a gap in a wall frames your subject within a frame, drawing immediate attention to it and adding depth to the image.
Symmetry creates visually satisfying images by finding and perfectly centering symmetrical scenes — a reflection in still water, a symmetrical building, a tunnel, a road stretching into the distance. For symmetrical compositions, centering the frame works beautifully, breaking the Rule of Thirds intentionally.
Negative space is the empty area around your subject. Deliberately leaving significant empty space around a subject — clear sky above a person, empty water beside a boat — creates a sense of scale, isolation, and visual breathing room that makes the subject stand out powerfully.
Changing your angle dramatically changes how a photo feels. Most people shoot from eye level — the perspective everyone expects. Crouching low and shooting upward makes subjects appear larger and more powerful. Climbing higher and shooting downward creates an interesting bird’s eye perspective. Moving around your subject and shooting from unexpected angles almost always produces more interesting results than simply shooting straight on from standing height.
Tip 11 — Use HDR Mode in High-Contrast Scenes
HDR stands for High Dynamic Range. When you have a scene with both very bright and very dark areas — a window in a dark room, a sunset, a person standing with a bright sky behind them — a standard photo will correctly expose either the bright areas or the dark areas but not both simultaneously. The result is a photo with blown-out highlights or completely black shadow areas.
HDR mode takes multiple exposures of the same scene at different brightness levels and merges them into a single image that captures detail in both the bright and dark areas simultaneously.
HDR is most useful for landscape photography, sunset and sunrise shots, architectural interiors with windows, and any scene where you have both bright light sources and shadowed areas you want to maintain detail in. Most modern phones enable HDR automatically when the camera detects a high-contrast scene, but you can also manually control it in the camera settings.
HDR is less useful for moving subjects — because it merges multiple frames, any movement between exposures can create a ghosting effect in the merged image.
Tip 12 — Edit Your Photos — But Edit With Restraint
Editing is not cheating. Every professional photographer edits their images. Straight-out-of-camera photos, even from the best cameras, typically look flat and dull compared to what they can become with considered editing.
The key principle is to edit to enhance what was already in the photo — not to create something artificial. Natural-looking edits that bring out the best in a photo are always more impressive and more timeless than heavy filters and extreme processing.
The most useful editing adjustments for most photos are brightness and exposure, contrast, highlights and shadows, white balance and color temperature, and sharpness. The built-in editor in iPhone Photos and Google Photos handles all of these well enough for most users.
For more control, Snapseed is a free, excellent editing app available on both iPhone and Android that gives you extensive manual adjustment tools including selective editing — allowing you to brighten, sharpen, or adjust specific parts of a photo without affecting the whole image. Adobe Lightroom Mobile is a more advanced option, also free for basic features, that offers the same tools professional photographers use.
When editing, a useful rule is to make your adjustments, then reduce them by about 30 percent. What looks good on a small phone screen while you are enthusiastically editing often looks overdone when viewed on a larger screen or after a few days of perspective. Subtle edits almost always age better than dramatic ones.
Tip 13 — Understand When to Use Each Camera Lens
Most modern smartphones have multiple cameras — wide, ultrawide, and telephoto — and knowing when to use each one dramatically improves the appropriateness of your photos for different subjects.
The main wide camera is your primary all-purpose lens. It handles the vast majority of everyday photography — portraits, street scenes, food, events, travel. This is the lens that receives the most engineering attention and produces the best image quality on any phone. When in doubt, use the main camera.
The ultrawide camera has a significantly wider field of view, capturing more of the scene in a single frame. It is ideal for landscape photography, architecture where you need to show the whole building, cramped interior spaces, and creative wide-angle shots. The ultrawide lens has more distortion than the main camera — straight lines curve slightly toward the edges — which can be visually interesting in architecture but unflattering in portraits.
The telephoto camera provides optical zoom, bringing distant subjects closer without quality loss. It is ideal for portraits — the slightly compressed perspective of a telephoto lens is extremely flattering for faces compared to a wide camera that can distort features when shooting close up — for wildlife, for sports, and for any subject you cannot physically approach.
Tip 14 — Pay Attention to Your Backgrounds
A common reason that otherwise good photos fall flat is a distracting, cluttered, or messy background. Your eye is drawn to the subject — but the camera captures everything in the frame equally.
Before pressing the shutter, take two seconds to scan the background of your frame. Look for busy patterns, strong colors competing with your subject, objects appearing to grow out of your subject’s head, or people walking through the background. Move yourself or your subject slightly to eliminate these distractions.
Simplifying backgrounds dramatically improves the impact of any photo. A clean, uncluttered background lets the subject breathe and draws all attention to where you intend it. Moving your subject slightly to change the background behind them — a plain wall instead of a cluttered street, open sky instead of a busy building — takes seconds and makes an enormous difference.
Portrait mode’s background blur helps with this, but it is always better to have a genuinely clean background rather than depending on software to blur away clutter.
Tip 15 — Shoot More, Review More, and Practice Deliberately
The most significant factor separating skilled photographers from average ones is not equipment, not natural talent, and not secret knowledge. It is volume of practice combined with deliberate review.
Taking more photos develops your eye for composition, light, and timing. But simply taking more photos without reflecting on them does not produce as much improvement as reviewing your photos critically and understanding why some work and others do not.
After any photography session, go through your photos and identify which ones worked best. Ask yourself why they worked. Was it the light? The composition? The timing? The angle? Then look at the ones that did not work and diagnose what went wrong. Was the light unflattering? Was the composition too centered? Was the background distracting?
This reflection loop — shoot, review, diagnose, apply — accelerates improvement faster than simply taking more photos without thinking about them.
Set small challenges for yourself to force growth. Spend one day shooting only in black and white, which removes color as a crutch and forces you to see in terms of light, shadow, and composition. Spend one afternoon shooting only from low angles. Spend a session shooting only with natural window light indoors. Constraints force creativity and expand your technical understanding faster than unrestricted shooting.
Quick Reference — The 15 Tips at a Glance
Tip 1 — Enable your grid and use the Rule of Thirds for every composition.
Tip 2 — Always tap to focus manually, then adjust exposure with the slider.
Tip 3 — Shoot in golden hour and overcast light, avoid harsh midday sun.
Tip 4 — Never use digital zoom — move closer or crop afterward instead.
Tip 5 — Use Portrait mode correctly — right distance, good light, separated background.
Tip 6 — Hold your phone perfectly still when using Night mode.
Tip 7 — Use Burst mode for moving subjects and action moments.
Tip 8 — Press and hold to lock focus and exposure for static subjects.
Tip 9 — Explore Pro or Manual mode to control ISO, shutter speed, and white balance.
Tip 10 — Use leading lines, framing, symmetry, negative space, and different angles.
Tip 11 — Enable HDR for high-contrast scenes with bright and dark areas.
Tip 12 — Edit to enhance naturally — use Snapseed or Lightroom Mobile.
Tip 13 — Use the right camera lens for each subject — main, ultrawide, or telephoto.
Tip 14 — Always check and simplify your background before shooting.
Tip 15 — Shoot more, review critically, and practice with deliberate challenges.
Frequently Asked Questions
Does a more expensive phone automatically take better photos?
Not necessarily. A skilled photographer with good technique consistently produces better photos on a budget phone than an unskilled photographer with a flagship device. The tips in this guide will improve your results on any phone. That said, flagship cameras do have genuine advantages in low light, dynamic range, and optical zoom that become relevant once your technique is already solid.
Should I shoot in RAW or JPEG?
For everyday photography, JPEG is perfectly fine and gives you immediately shareable images. RAW files capture all the data the sensor records, giving you much more flexibility when editing — you can recover overexposed highlights, lift shadowed areas, and adjust white balance completely — but they require dedicated editing before sharing and take up significantly more storage. If you want to develop your editing skills seriously, shooting RAW with apps like Lightroom Mobile or ProCamera gives you far more editing latitude.
What is the best free editing app for smartphone photos?
Snapseed is the most capable and flexible free editing app available on both iPhone and Android. It offers all the essential adjustments plus advanced tools like selective editing and healing. Adobe Lightroom Mobile is excellent for those who want a more professional workflow with greater consistency across a collection of photos.
How do I reduce blurry photos?
Blur in smartphone photos comes from two main sources — camera shake and subject motion. For camera shake, hold the phone with both hands, keep your elbows tucked against your body, tap to focus rather than just pressing the shutter, and ensure your shutter speed is fast enough in Pro mode. For moving subjects, use Burst mode to capture multiple frames and select the sharpest one, or increase your shutter speed in Pro mode to freeze the motion.
Is it worth buying accessories for smartphone photography?
A small flexible tripod is genuinely useful and inexpensive — it eliminates camera shake entirely, enables long exposure shots, and allows self-portraits without a timer sprint. A clip-on wide angle or macro lens adds creative options that your phone’s built-in lenses cannot achieve. Beyond these basics, most accessories have diminishing returns compared to improving technique with the phone you already have.
How do I make my food photos look better?
Food photography benefits enormously from natural light — position your plate near a window with soft natural light coming from the side rather than directly overhead. Shoot from directly above for flat lay shots of multiple dishes, or from a 45-degree angle at plate level for single dishes with depth. Clean the background — a plain surface, a simple tablecloth, or a wooden board — removes distractions. Add small props — a fork, a napkin, a few fresh ingredients — to add context and visual interest without cluttering the frame. Never use the flash for food — it creates harsh, unflattering light that makes food look unappetizing.
Final Thoughts
Your phone’s camera is already capable of producing stunning images. The sensor, the lenses, and the computational photography software built into modern smartphones represent decades of engineering progress. What transforms a camera into a tool for great photography is the person holding it.
The 15 tips in this guide are not complicated. They do not require new equipment, new apps, or expensive accessories. They require attention, deliberate practice, and the habit of thinking before pressing the shutter rather than after.
Start with the three most impactful changes for most beginners: enable your grid and use the Rule of Thirds, always tap to focus manually and adjust exposure, and move to better light rather than accepting whatever light you happen to be in. These three habits alone will produce a visible improvement in your photos immediately.
Then work through the rest of the tips gradually — each one adds another layer of understanding and control that compounds over time. Photography is a skill, and like any skill, it rewards consistent, thoughtful practice more than any camera upgrade ever could.